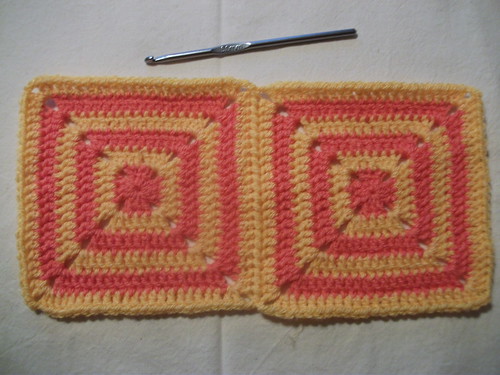
The Squares
12-1 uses Matador and Shrimp
6-7 and 6-8 use Shrimp and Saffron
Construction Note
A quick note about construction, I'm using the same style of square from the pattern and my colour chart (shown here) indicates I will be changing colour every round. I start my squares using a magic adjustable ring and use my earlier blog entry to join the squares together, here.
Construction Order
Before I go ahead and get started I'm going to check out the pattern and see if there's a nice neat sequence I can use to join the squares together. At the moment this is easy to decide as we haven't started yet, so let me try to explain what I decided and why.
I could make 12-1 first then attach 6-7 and finally 6-8, however that would mean that 6-8 would have to be "set in" to a corner. While joining into a corner isn't harder, as I'm new to this I want to try and keep the early joins straightforward. So what I'm going to do is join 6-7 and 6-8 together first and then attach 12-1 to the side of them
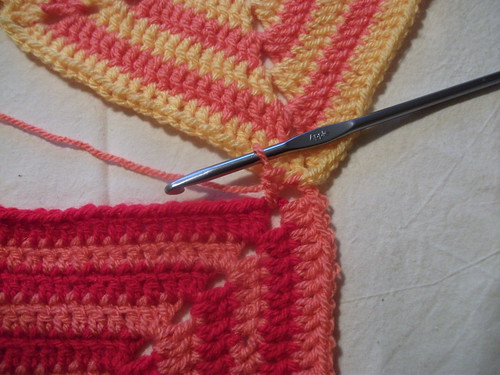
The First Join
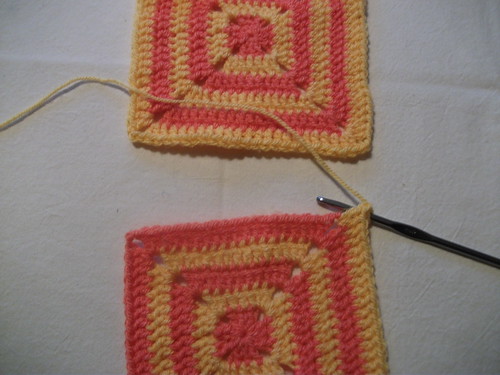
The joining is done on the last round of the squares, so for now I'm going to start by making each square to one round less than they are supposed to be. At that point I'm going to take the time to weave in any tail ends as the last thing I want is to have all my ends to weave in later as I know I will have a lot of them. We are using Part 1 of my tutorials for this join.
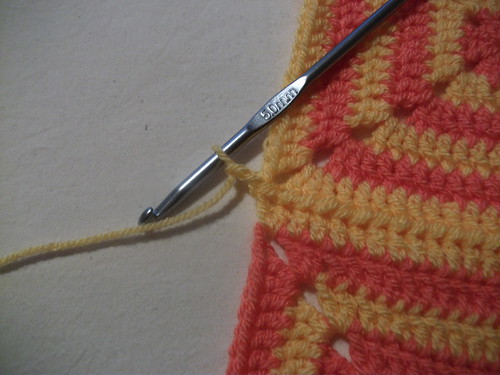
The first picture shows me ready to start my join, in the corner I've done 2 DC and 1 chain.
The next picture shows the first chain joined and made.
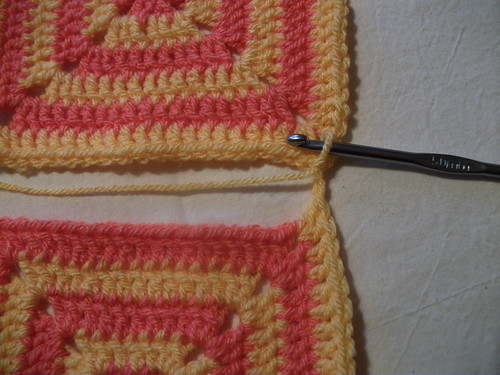
Heres the first DC joined and made. Continue on from here, joining each DC in turn.
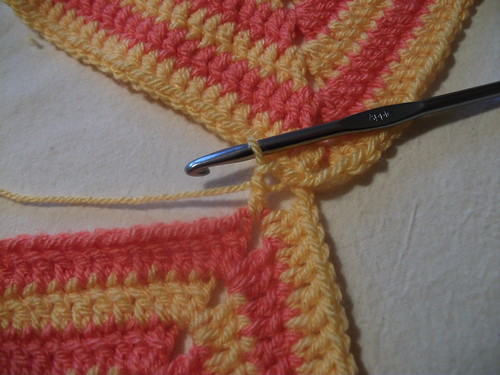
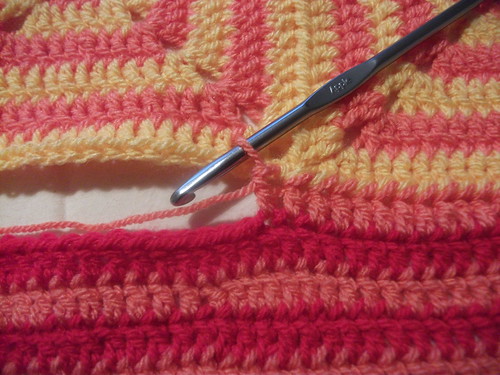
The last DC joined and made.
Now, the last picture, this shows the join completed, there are 23 DC on the side of these squares.
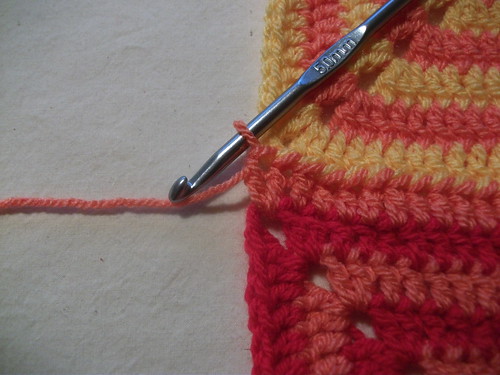
Adding 12.1
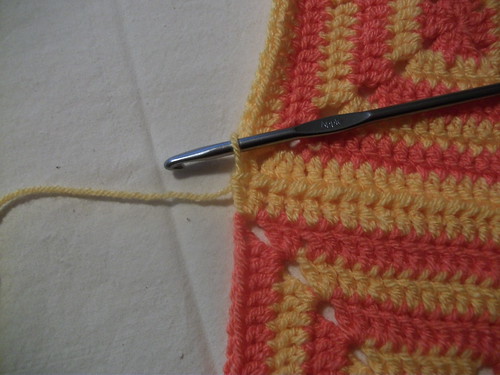
Next I need to join 12.1 onto the side of this piece, 12.1 has 47 stitches on one side. To verify that the join will fit here's the maths, 23 multiplied by 2 is 46, add in 1 for the seam, equals 47 (the number of stitches on the side of 12.1). The picture below show me ready to begin my join. I used Part 4 of my joining series to add this square.
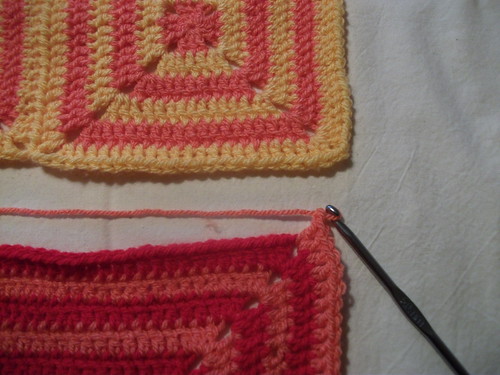
The next picture shows the first chain joined and made.
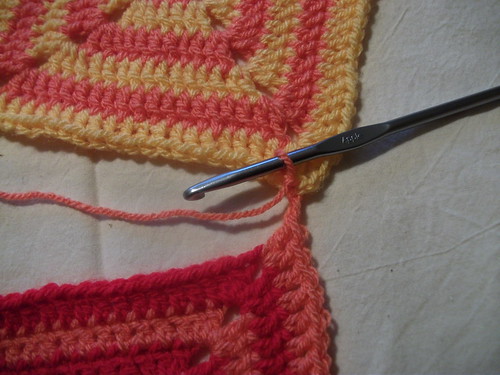
Here's the first DC joined and made. Continue on from here, joining each of the next 22 DC in turn so you have 23 DC joined and made.
Here we have 23 DC joined and made, the loop just prior to making the 24th DC has been joined through the free corner chains of the other two squares.

Now we have made the 24th DC and can continue to join the remaining 23 DC to 6.8.
The last DC joined and made.
The end of the join, the 2 chains.
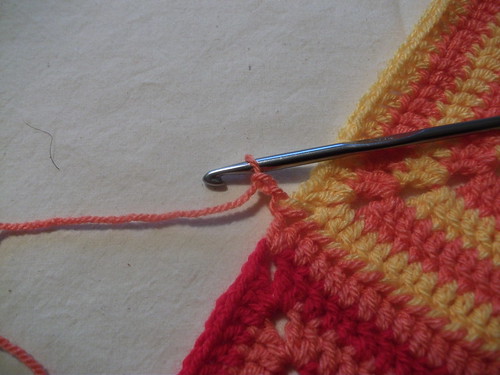
Now, the last picture, this shows the join completed.
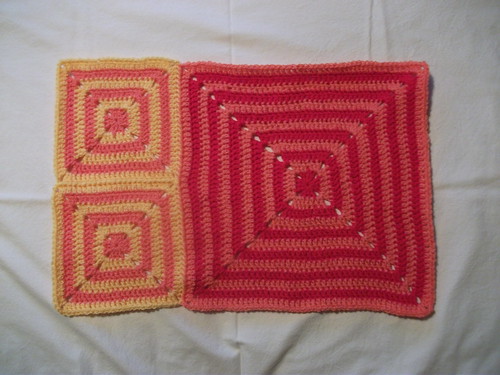
I love the way the orange when next to the yellow looks very orange but when next to the red it looks like a salmon pink. I am really enjoying making this so far, the joining method is making it fun. I love the way the join looks when there are 2 colours as its easy to do :)
Have Fun!
No comments:
Post a Comment